WordPress website migration using cPanel, the easy way
Hosting expired, grabbing the Black Friday offer, or upgrading our hosting, we may need to migrate a WordPress website for many reasons. And there are more ways to migrate WordPress websites. You can use plugins and hosting tools or do it manually. Here, I’ll explain the manual way. This requires a little bit of manual work but works perfectly with full control in your hand and is safe from unknown errors compared to using a 3rd party tool. If you have access to cPanel both for the source and destination sites, we’re good to go. Let’s get started, step by step.
1. Understanding the architechture
Let’s discuss the structure of a WordPress website in the context of migration. The wp-content folder and the wp-config.php file are the main things to understand apart from WordPress core files. The wp-content folder/directory holds the files for your themes, plugins, media files, and other related things necessary for your visual website. The wp-config.php file is the heart of your website and a bridge to connect the site to the database. Without this wp-config.php file and the wp-content directory, WordPress will not work.
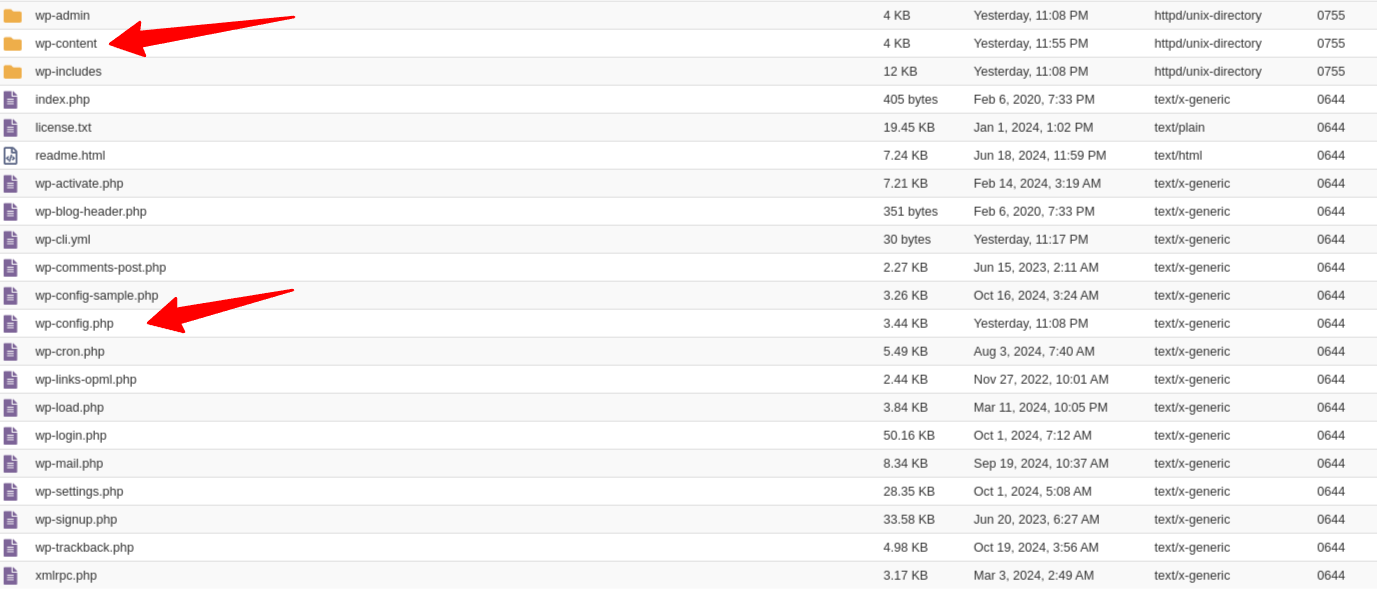
Assume you have the core files of WordPress, and the above image reflects that.
2. Backup the site
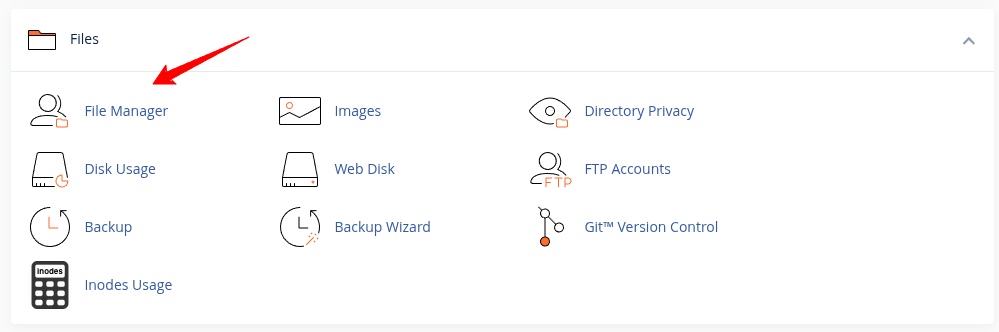
Before beginning the migration, we must backup the source site. To backup site files, click “File Manager” from the cPanel Dashboard to access the site files.
It will take us to the file manager. The “public_html” directory holds the site files if we have a single site on the hosting. If we host multiple sites in a single hosting, there should be a specific directory for each site inside the public_html or out of it that matches the domain name or is close to the domain name. We’ve to check it carefully in that case.
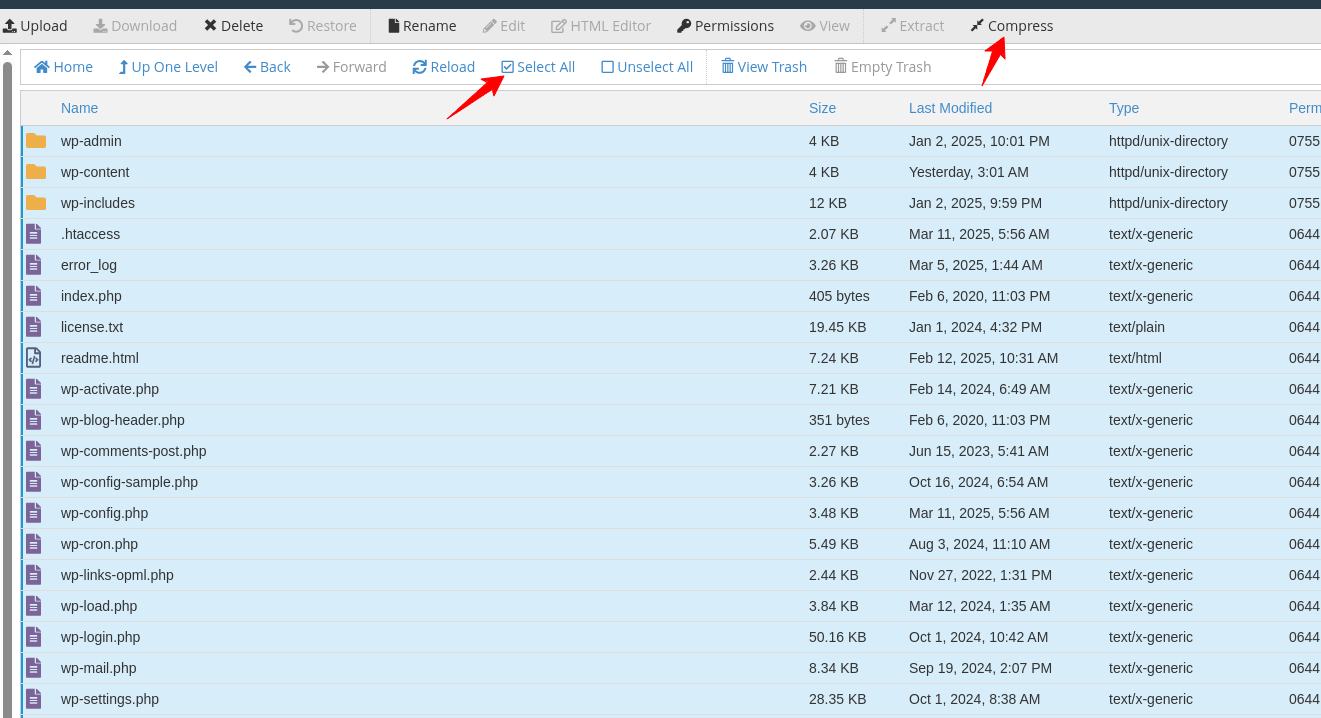
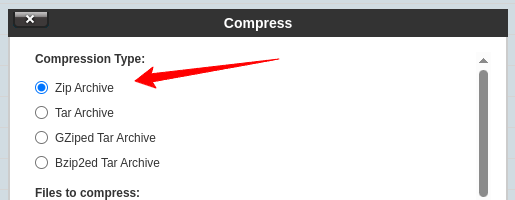
We’ll select all the files and folders in our site directory and click the “Compress” link to create a .zip file. Remember, the wp-content directory and the wp-config.php file are the main ones for our site. However, we’re taking the whole site backup and keeping all the files in our .zip file. We’ll select ‘Zip Archive’ as our compress option and click the button “compress files” to proceed.
After a successful compression, the zip file should be inside the directory. Here, I got the zip file named wp-admin.zip. We can also set a custom name as well.
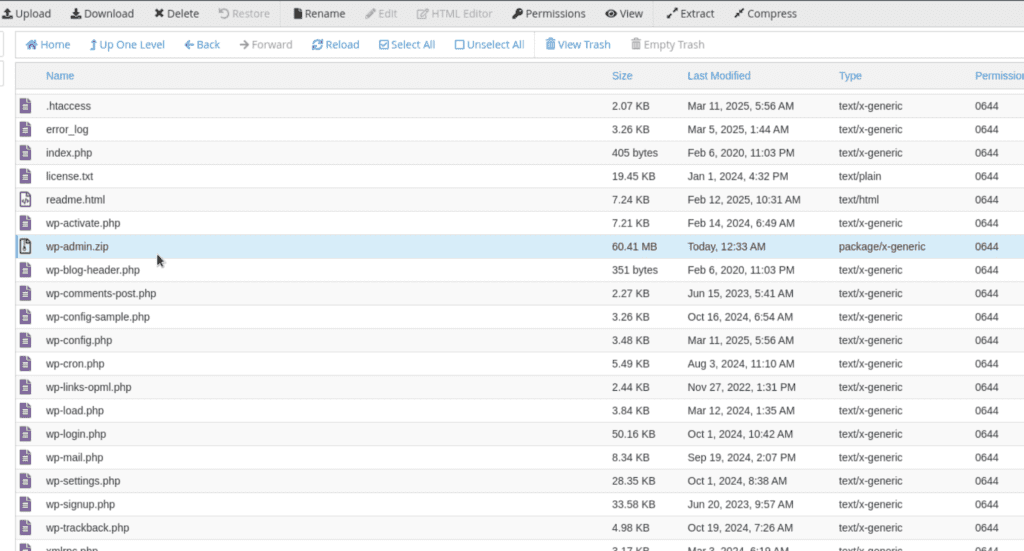
We’ll select that file and click the “Download” link from the top menu bar to download and store it. It’s time to back up our database.
3. Backup the Database.
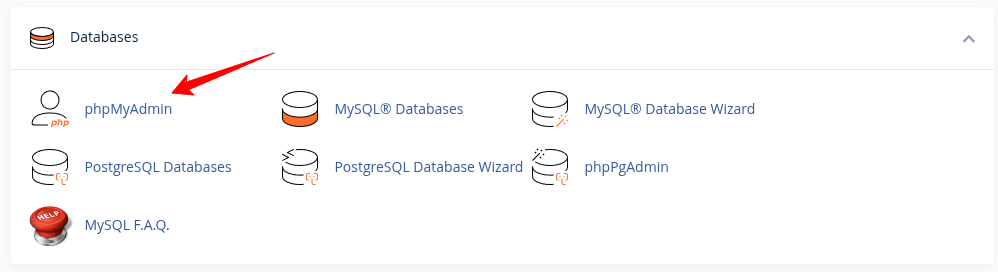
Click “phpMyAdmin” from cPanel to access the Database(s).
Multiple databases could exist, but we must select the related one. Click the database from the left panel to select it, then click “Export” to export the database.
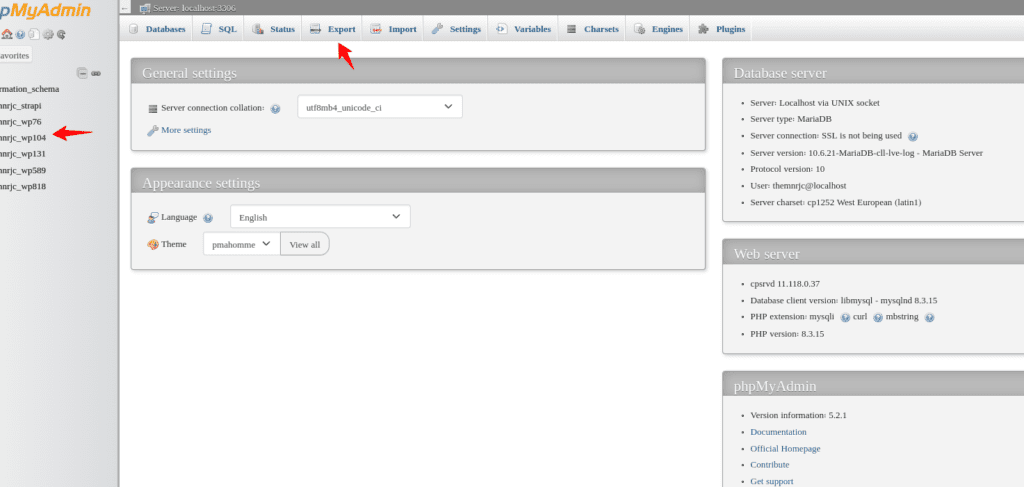
One question may arise: How do I know which one is related to the database? Yup, we can open the wp-config.php file and check the database name. Right-click on wp-config.php and ‘view’ it; look for “DB_NAME.”
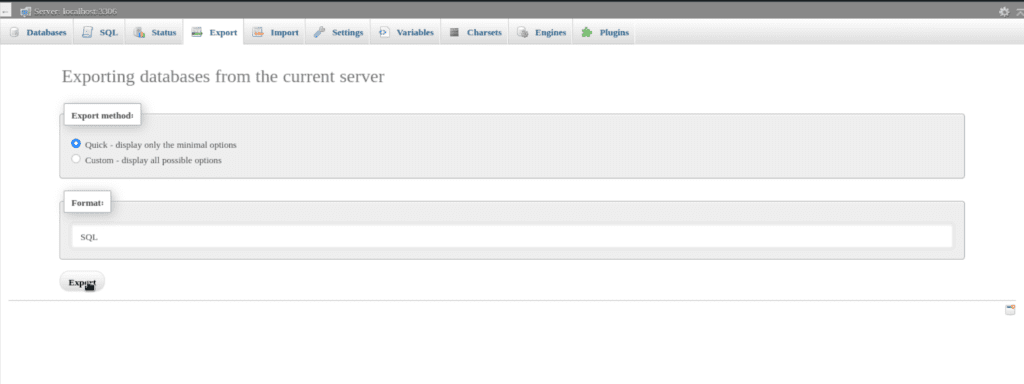
Export the Database file in SQL.
4. Setup the Destination site.
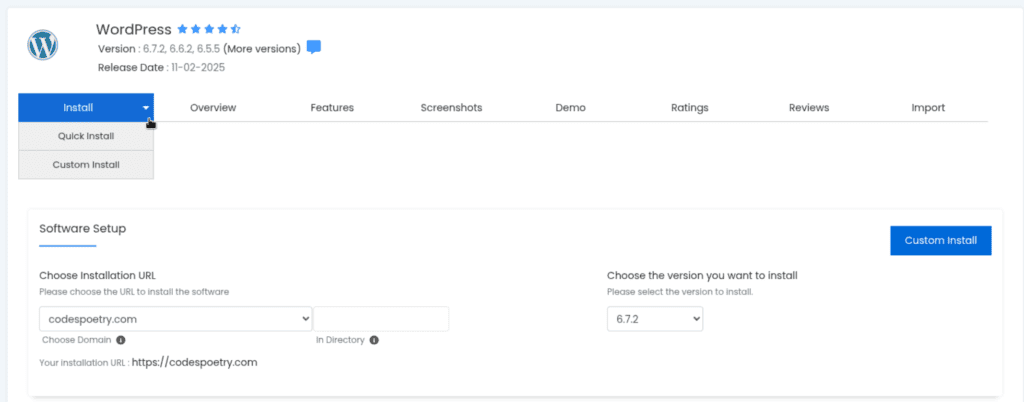
I’ll install a new WordPress site using Softaculous through cPanel to setup a new destination site. If we have any existing one, this step will be skipped.

“Install” WordPress.
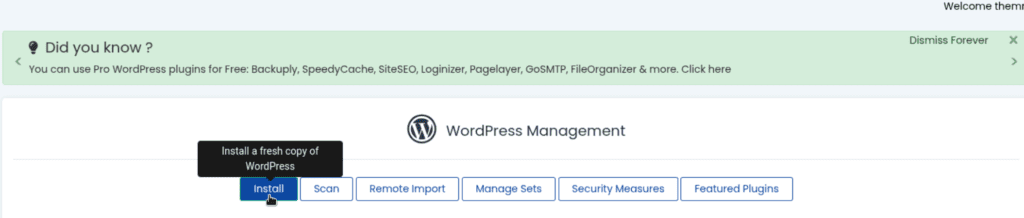
Select “Quick Install” from the dropdown. Quick Install will ensure a basic WordPress site without pre-packaged plugins or themes. While Custom Install may add a few plugins and themes as your hosting configures it. Since we’re migrating our own site, a basic setup is preferred. We’ve our own plugins and themes. Isn’t? 😉 The system will generate a new database and set a password. We don’t care. We have to select our domain. If the domain is connected to the destination site cPanel, the domain should be in list.
The installation will be completed in a moment, and we should be able to visit our new site. Upon completing this installation, we’ve got our destination site and a backup of your source site.
5. The Migration
Remember the architecture? The wp-content directory/folder and the wp-config.php file are the heart of our website. We have that for our destination site, as we setup earlier. But the default wp-content directory doesn’t serve our purpose. The wp-config.php file is connected to a database with all basic tables for a fresh WordPress installation. Now, our task will be to import our database to the existing destination site’s database and replace the wp-content directly with our source site’s wp-content.
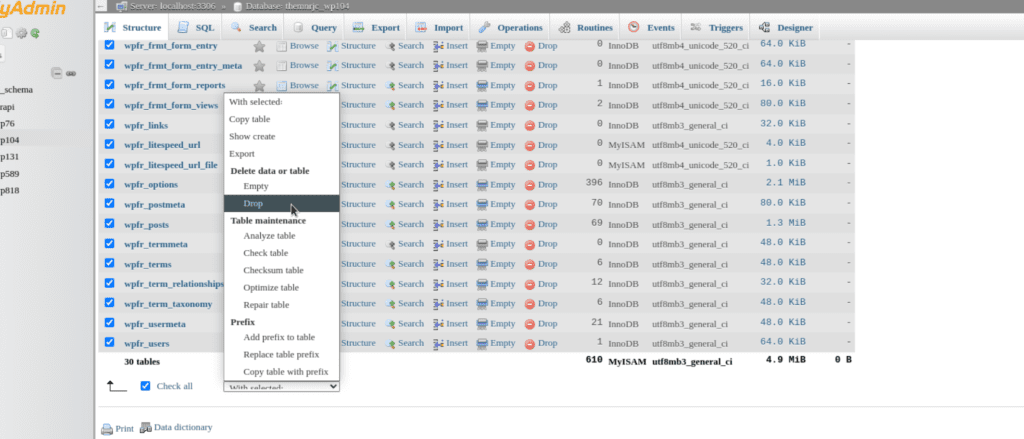
Clear the database
Following the method described above, we can check our destination site’s database and access it through phpMyAdmin. Select the database from the left panel by clicking on it, select all the tables of that database and drop.
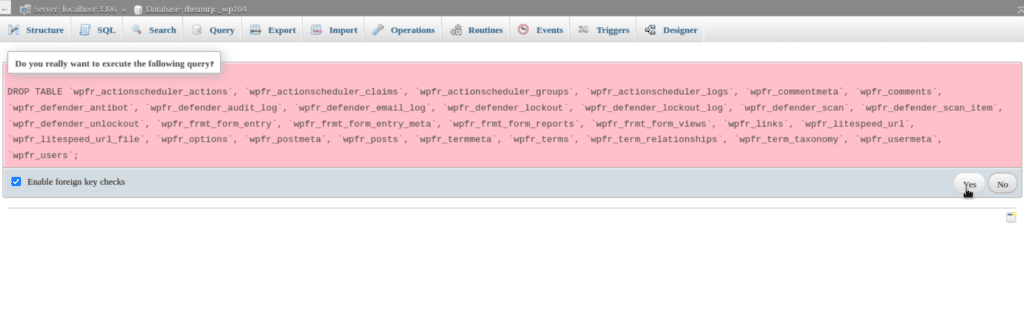
Our database is now empty, and not a single table exists now.
Import
To import our source site database, click the “Import” tab while selecting our destination site database, which we just cleared out. Select the source site database and click the “Import” button.

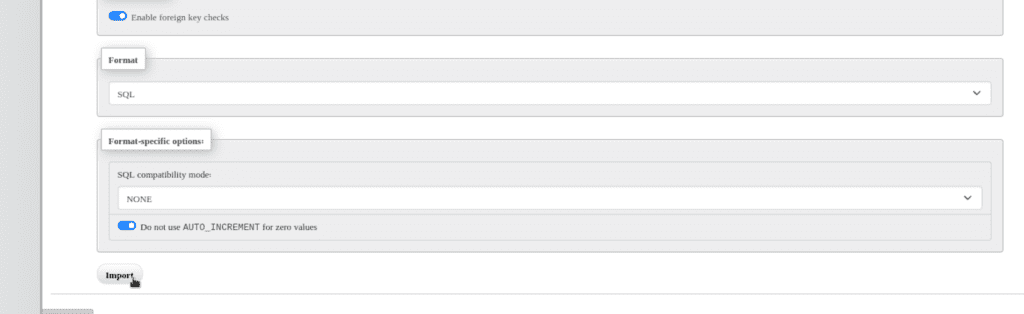
Once the import will complete, you’ll a success message in green.
Replace the wp-content
Our database is in place; it’s time to replace the wp-content. To do so, we’ll visit the new site directory through cPanel
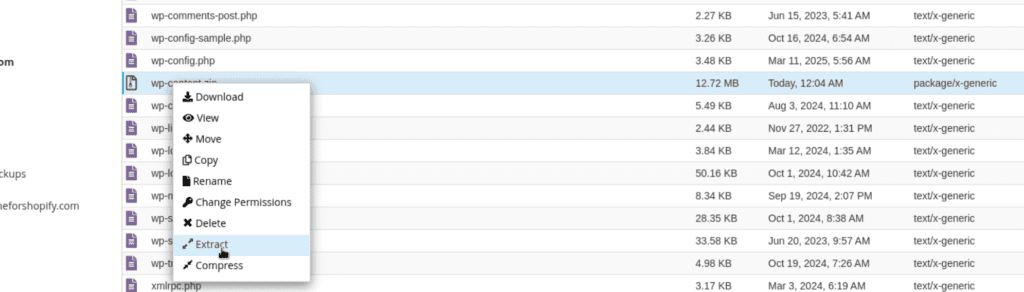
Delete the existing wp-content directory, as this one is for the new site we created a while ago. Remember, we had a backup of our source site. We’ll extract that and create a zip file only for the wp-content directory. This is because we won’t be able to upload a directory/folder without zipping.

After uploading the content.zip, I’ll extract it from my site directory.
We haven’t uploaded the wp-config.php file yet, right? I described it as the heart of a WordPress site. The existing wp-config.php file on the destination site has all the required info to connect to the database. We also imported our database tables into it, so we got the connection. So, no need to upload the wp-config.php file.
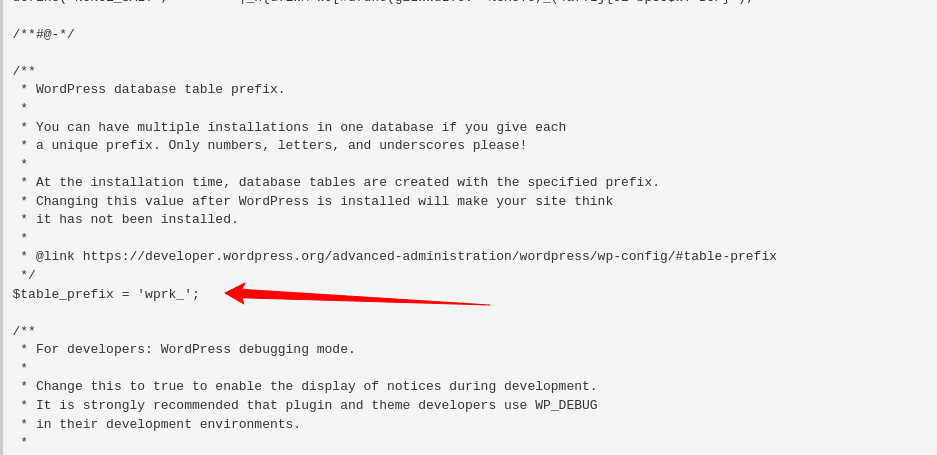
However, there is one more issue, which is the table prefix in the wp-config.php file. We can open the wp-config.php file from our source site backup and copy $table_prefix to replace $table_prefix of the current wp-config.php file. Make sure to copy the whole line and replace the same. That should be all!
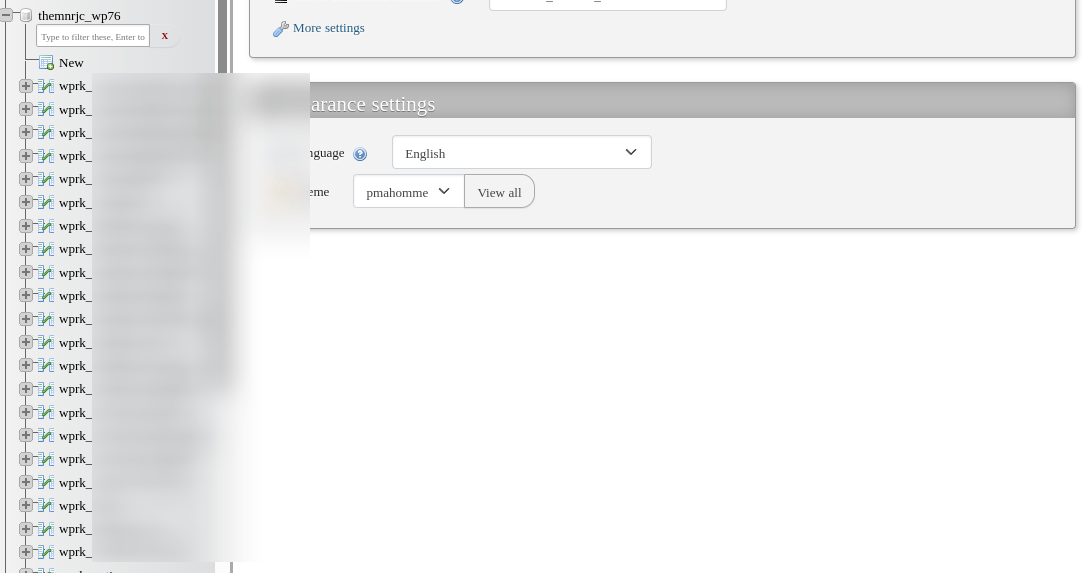
The unblurry text in database tables is called $table_prefix in the WordPress database, and the blurry part is the table’s name. It’s also possible that you don’t have any prefixes for tables. In that case, table_prefix will be = ''; An empty value in the wp-config.php file. the table_prefix is required even if it’s empty.
We have our database in place. We uploaded the wp-content directory to replace the wp-content directory of the basic WordPress installation and changed the $table_prefix to match the database table prefix.
The site should be live now, and our migration is complete.
If you’re stuck at some point and need human help, check out my gig on Fiverr.
Do share if you like this tutorial, and let me know your concerns in the comment box below.